
RECENT POSTS


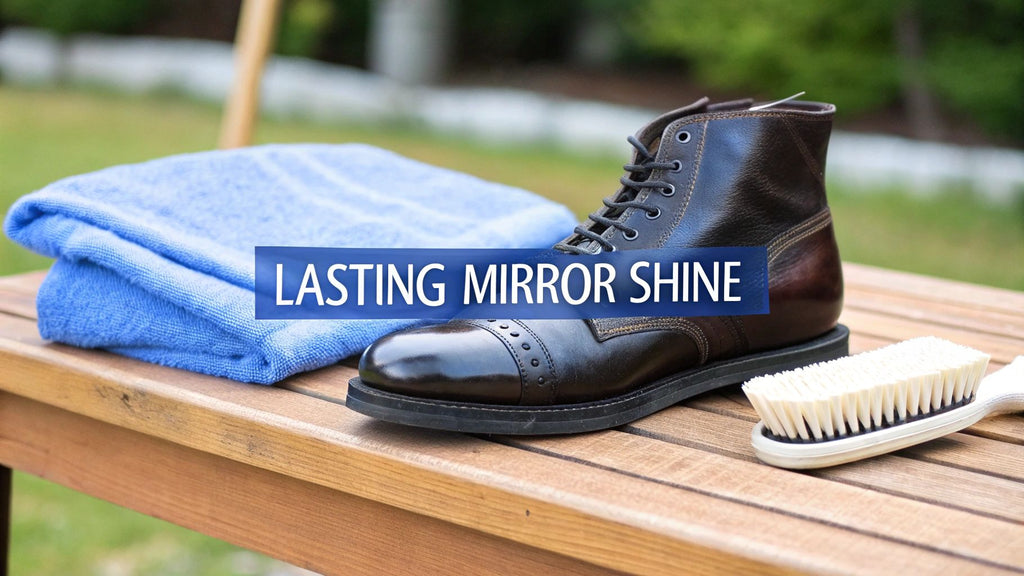
How to Polish Leather Boots for a Lasting Mirror Shine
Learning how to properly polish a pair of leather boots is more than a quick wipe with a rag. It’s a time-honored ritual in three parts: cleaning, conditioning, and finally, polishing with a quality wax or cream. Mastering these stages doesn't just make your boots look good—it nourishes the leather, honoring the craftsmanship and protecting your investment for years to come.
This educational process is the secret to preserving the very soul of your handcrafted footwear.
Why a Perfect Polish Is More Than Just Shine
For anyone who owns a pair of premium, handcrafted boots, this process is less about routine maintenance and more about a commitment to quality. A proper polish is a nod to the traditional craftsmanship that went into your boots, an essential part of the ownership experience that keeps them looking as sharp as the day they were unboxed.
But this isn't just about appearances. Every layer of conditioner and polish you apply is a protective measure. Think of it as a shield that guards the leather against the elements, repelling water and preventing the cracking that comes from dryness. This is especially true for our bespoke boots from the Design Lab, where unique leathers and custom finishes demand that extra level of personalized care.
The Real Purpose Behind the Polish
The payoff for a consistent care routine is immense. Regular polishing does more than just keep your boots looking great; it actively extends their life by restoring the natural oils that leather loses over time. Without that moisture, leather grows dry, brittle, and loses its character. This simple habit ensures the rich color and perfect fit you fell in love with are there for every single wear.
A great polish is a direct investment in longevity. It's the difference between a pair of boots that lasts a season and a pair that becomes a trusted companion for a decade.
There's also a connection you build with your footwear during the process. It’s a quiet moment to appreciate the quality of the materials and the skill of the global artisans who crafted them. In the end, polishing leather boots isn't just about the shine—it’s a time-honored practice for extending the life of premium footwear.
In fact, consistent care can extend the lifespan of leather boots by up to 50%. That’s a significant saving, all by restoring the material's look and feel while adding a crucial layer of waterproofing. You can learn more about the market impact of proper shoe care from industry research.
Assembling Your Essential Polishing Toolkit
Getting that deep, professional shine on a pair of handcrafted boots has very little to do with aggressive buffing and everything to do with having the right tools. Think about it this way: our global artisans select specific leathers and lasts for each bespoke design. In the same way, you need a curated kit to properly care for that investment.
Having the essentials ready to go transforms a chore into a deeply satisfying ritual. A quick prep session ensures a smooth process, preventing you from stopping mid-polish to hunt for a cloth. A well-organized toolkit is truly the first step toward mastering the art of the boot shine.
Your Polishing Toolkit Checklist
To make things easy, here’s a quick-reference table of everything you’ll need to get started.
| Tool/Product | Primary Purpose | Alexander Noel Pro Tip |
|---|---|---|
| Large Horsehair Brush | Removing loose dirt and debris before cleaning. | Use quick, firm strokes to dislodge grime from welts and seams. |
| Dauber Brush | Applying polish evenly into the leather grain. | A circular motion works best for getting polish into creases. |
| Buffing Horsehair Brush | Creating the initial shine after the polish has set. | Speed is your friend here. Fast, light strokes generate heat and luster. |
| Soft Cloths | Applying products and buffing to a high gloss. | Old, clean cotton t-shirts are perfect. Designate cloths for light vs. dark polish. |
| Leather Cleaner | Lifting dirt and old polish without damaging the leather. | Never substitute with household soap—it will dry out the leather. |
| Leather Conditioner | Moisturizing the leather to keep it supple and prevent cracks. | Think of it as lotion for your boots. Don't skip this step! |
| Cream Polish | Restoring color, covering scuffs, and nourishing the leather. | Ideal for routine maintenance and bringing faded color back to life. |
| Wax Polish | Creating a high-gloss, protective, water-resistant topcoat. | Use sparingly for a "spit-shine" effect on the toe caps and heels. |
With these items in your arsenal, you're prepared for any polishing task.
Core Polishing Instruments
Your brushes and cloths are where the rubber meets the road—or rather, where the bristle meets the leather. Quality is paramount. These tools make direct contact with the premium hide of your boots, so choosing wisely prevents scratches and pesky lint.
- Horsehair Brushes: You'll want at least two. One is a larger brush for sweeping away surface dust before you start. The other, your buffing brush, is for bringing out that brilliant shine after the polish has dried.
- Soft Cloths: Lint-free is the name of the game. Microfiber or old cotton cloths are your best bet. Keep one for applying polish, another for wiping off the excess, and a final, pristine one for the last buffing pass.
Here’s a crucial tip I’ve learned over the years: dedicate separate brushes and cloths for different colors of polish. Using the same applicator for your black boots and then your tan ones is a surefire way to muddy the colors and ruin a perfect finish.
Take the time to build a complete kit from the get-go. It’s the single best way to protect your footwear and makes the whole process more efficient. You’ll never be tempted to cut corners that could damage the leather.
Cleaners, Conditioners, and Polishes
With your application tools sorted, it's time to select the right products. The world of leather care can seem complicated, but it really boils down to three key categories, each with a distinct and vital role.
Leather Cleaner: This is a specially designed formula that gently lifts dirt, grime, and layers of old polish. The key is that it cleans without stripping the leather of its essential, natural oils.
Leather Conditioner: This is moisturizer for your boots, plain and simple. It penetrates deep into the leather’s pores, replenishing the fats and oils that keep it flexible and prevent it from becoming brittle and cracked.
Polish (Cream vs. Wax): The final step depends on the finish you're after.
- Cream Polish: This stuff is fantastic. It has more pigment and conditioning agents, making it perfect for restoring color, covering minor scuffs, and giving the leather a dose of nourishment.
- Wax Polish: This is your high-gloss finishing touch. It sits more on the surface of the leather, creating a protective barrier against water and scratches. Many of us will use a cream polish first, then follow up with a light layer of wax for that ultimate mirror shine.
For a curated selection of these essentials, we've put together a detailed guide on building the perfect leather shoe care kit.
Preparing the Canvas: Cleaning and Conditioning
Before a single drop of polish touches your boots, the leather must be perfectly clean and properly nourished. Trying to polish over dirt, dust, or caked-on layers of old wax is like trying to paint on a dusty canvas—the end result will be dull, uneven, and won't last.
Frankly, this prep stage is the most critical part of the entire process. Get this right, and everything else falls into place.
Think of it as hitting the reset button on the leather. You're creating a clean, receptive surface for the conditioner and polish to do their jobs properly. It’s a lot like learning the safe methods for cleaning antique brass; you have to do the careful prep work before you get to the final shine. Skipping this step actually grinds abrasive dirt into the hide when you polish, slowly damaging the leather over time.
The Initial Clean-Up: Removing Surface Debris
First things first, let's get the loose stuff off. Start by pulling out the laces. This gives you total access to every nook and cranny, especially the tongue and around the eyelets, and it keeps your laces from getting stained later.
Now, grab your large horsehair brush. Use quick, confident strokes to brush down the entire surface of both boots. You’ll want to pay extra attention to the welt—that’s the seam where the boot's upper meets the sole. It’s a magnet for dirt and dust. The goal here isn't a deep scrub; it's just to knock off all the surface-level debris.
Deeper Cleaning for a Flawless Foundation
With the loose dirt gone, it’s time to get a little more detailed. Lightly dampen a soft, lint-free cloth with a good leather cleaner. Whatever you do, never use household soaps, detergents, or all-purpose sprays. Their harsh chemicals will strip the leather of its essential oils, leading to dryness and cracking.
Gently work the cleaner into the boot using small, circular motions. You’re not trying to scrub the life out of it, just lift away any stubborn grime or old polish. For a more detailed walkthrough of this part, you can check out our complete guide on how to clean leather boots for more tips from the pros.
Once you’re done, wipe the boots down with a fresh, dry cloth and let them air dry completely. Keep them away from direct heat or sunlight.
Pro Tip: Patience is everything here. It's tempting to speed things up by placing boots near a heater, but that’s a fast track to shrunken, cracked leather. Give them at least an hour to dry naturally at room temperature.
The Crucial Art of Conditioning
Your boots are now clean and dry, which means it’s time to condition. This is the single most important thing you can do to keep the leather from getting brittle and to maintain that supple, luxurious feel. A quality leather conditioner is basically a moisturizer for the hide, putting back the natural fats and oils that get lost over time.
Using another clean cloth, apply a small, dime-sized amount of conditioner. Work it into the leather with those same small, circular motions, making sure you get even coverage everywhere, including the tongue and along the seams. Good leather will drink it right up.
Let the conditioner soak in for at least 20-30 minutes. You might see the leather's color darken a bit as it absorbs the moisture—that's totally normal. After it has had time to penetrate, take a clean cloth and buff off any excess.
Now, your boots are perfectly prepped and ready for polish.
Mastering The Art Of Polishing And Buffing
This is the moment your boots reveal their true glow. Achieving that rich, deep luster isn’t about brute force—it’s about patience, finesse, and working with the leather, not against it.
You’ll go through two main stages: nourishing the leather with polish, then buffing it to life. Each phase sets the stage for the next until you’re left with a finish worthy of handcrafted premium footwear.
Before you touch your polish, make sure you’ve prepped the leather properly. Here’s a simple three-stage process:
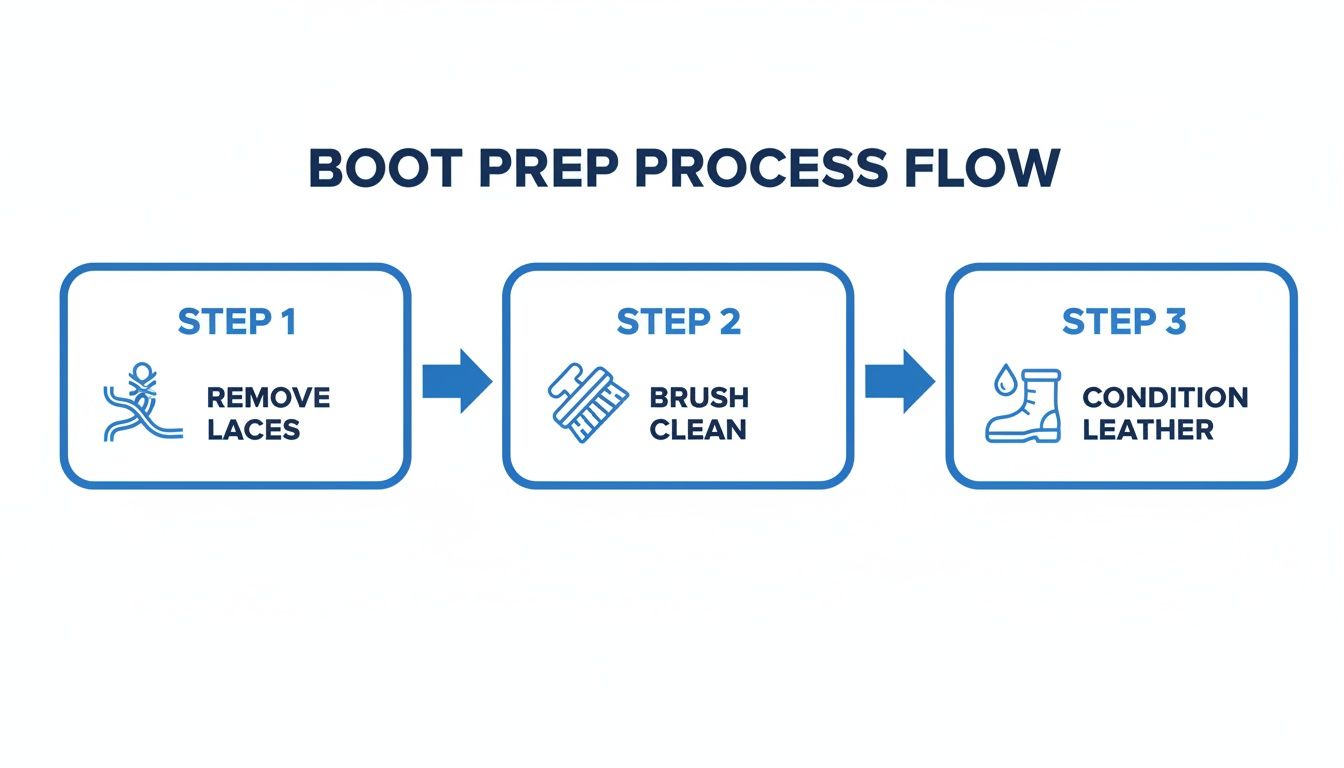
- Remove Laces: Expose every surface for an even treatment.
- Brush Away Debris: A soft-bristled brush sweeps off dirt and old polish.
- Condition Leather: A thin layer of conditioner restores suppleness and preps the grain.
Applying Polish With Precision
Think of polish as a light veil of protection—not a thick mask. Your goal is a whisper-thin layer that seeps into the pores without building up on the surface.
- Use the Right Tool: A dauber brush or a soft, lint-free cloth wrapped around two fingers.
- Work in Circles: Small, tight rotations force wax and pigment into the grain.
- Start at the Toe: Move backward, reloading sparingly.
- Mind the Seams: Don’t forget seams and welt for a truly uniform look.
Once both boots are coated, let them sit. Wait at least 10-15 minutes—the waxes need time to harden. Rushing this step invites smears and dull patches.
Buffing Your Boots To A Brilliant Shine
When the polish has set, it’s time to buffer. Grab a clean horsehair brush and use gentle, side-to-side strokes. The friction generates just enough heat to melt the wax into a smooth, glossy layer.
- Light Strokes: Glide the brush without pressing too hard.
- Quick Passes: One or two minutes brings out a warm, inviting glow.
- Finish With Cloth: A soft cotton rag removes dust and pushes the shine to its peak.
A glowing finish isn’t just for show; it locks in conditioning agents and shields the leather from moisture and dirt.
Achieving The Coveted Mirror Shine
When you want that flawless, glass-like toe cap, the spit-shine (water-glazing) technique is your answer. It builds multiple ultra-thin wax layers that reflect light like a mirror.
- Apply a Base Coat: Lay down a solid foundation of wax polish on the toe cap.
- Add Water: Wrap your finger in cloth, pick up a dab of polish, then dip into cool water.
- Work in Circles: Use very light pressure in tiny, tight rotations.
- Repeat and Refine: Let each micro-layer dry briefly before the next; you’ll see the mirror effect emerge.
This approach demands patience and a delicate touch, but the payoff is unrivaled. For a deeper dive into this artisanal finishing craft, check out the art of handmade patina.
Troubleshooting Common Polishing Problems
Even with the most careful technique, life happens. Scuffs, water spots, and polish buildup are just part of the territory when you actually wear and enjoy your boots. Knowing how to tackle these little issues is what keeps your handcrafted footwear looking its best day in and day out.
Think of this as your personal guide to restoring your boots' finish. Whether you're dealing with a minor scuff from a misstep or a stubborn stain, these fixes will give you the confidence to bring them back to pristine condition.
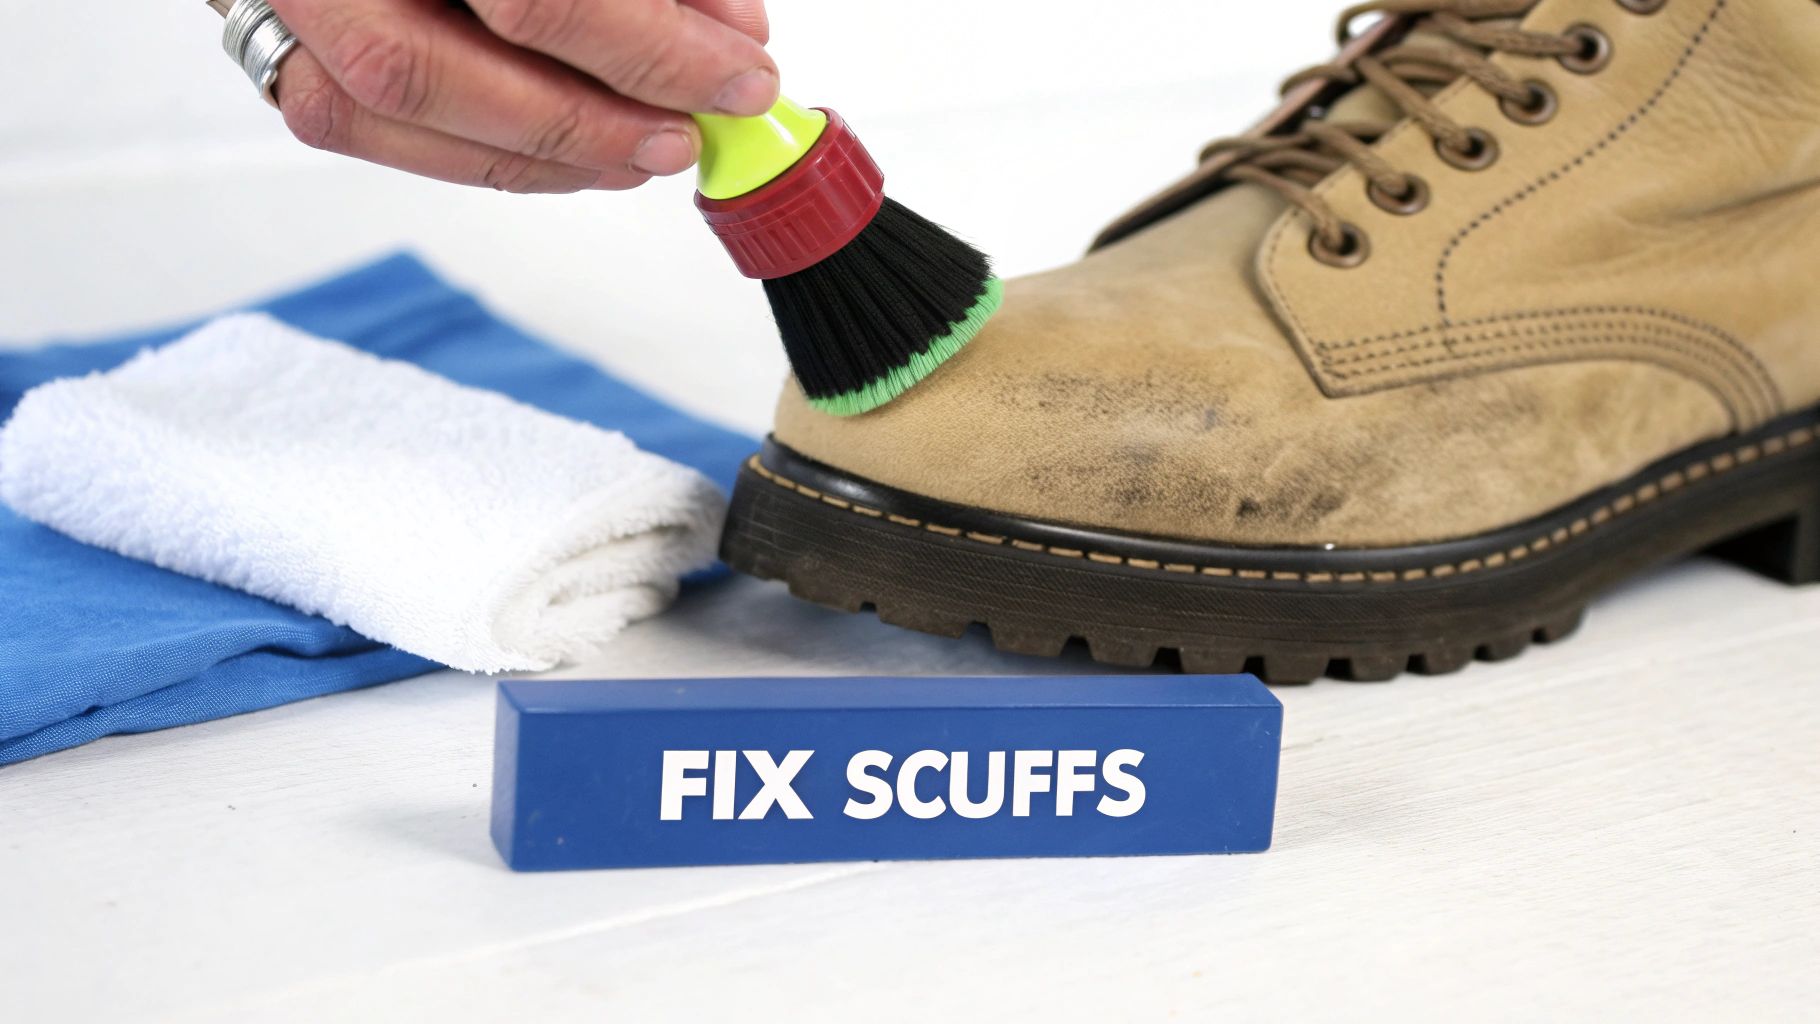
Handling Scuffs And Scratches
Minor scuffs and light scratches are inevitable, but they're also usually an easy fix. A high-quality cream polish with a matching pigment is your best friend here.
The trick is to apply the cream directly onto the scuffed area with a soft cloth, working it in gently. The pigments in the polish will fill in the light abrasions and blend the color seamlessly with the surrounding leather. For a more detailed walkthrough, you can learn how to remove scuff marks with our complete breakdown.
It's no surprise that in professional settings where a sharp appearance is non-negotiable, this is the go-to method. Consistent upkeep with brush-applied polishes has been shown to reduce the appearance of scratches by 60% on premium leathers, potentially adding two to three years to the life of the boots.
Dealing With Polish Buildup
Over time, it's easy to get a little heavy-handed with wax polish. This can lead to a thick, cloudy film that actually hides the leather's natural beauty. When you notice that dullness creeping in, it's time to strip things back and start fresh.
To remove the excess wax safely, just dampen a clean cloth with a dedicated leather cleaner or even a small amount of rubbing alcohol. Gently wipe the boot in a circular motion, and you'll see the old layers of wax start to lift right onto the cloth.
Patience is key—use light pressure to avoid damaging the leather's finish. Once the buildup is gone, let the boots dry completely before moving on. A thorough conditioning is a must before you apply a new, thin layer of polish.
Fixing Unexpected Water Stains
Getting caught in a downpour can leave behind those frustratingly obvious water spots on your leather. The secret to getting rid of them isn't to dry the spot, but to blend it.
Start by lightly dampening a clean cloth with water. Gently blot the entire boot panel, feathering the moisture out from the stain to the edges. This helps the entire section of leather dry at the same rate, evening out the tone and making the original spot disappear.
When working with unique finishes or a custom color from our Design Lab, always test any cleaning product on a small, inconspicuous area first, like the inside of the tongue. This simple precaution protects the bespoke artistry of your boots.
Let the boots air dry naturally, far away from any direct heat sources. Once they're totally dry, a good conditioning session will restore their supple feel and get them ready for a fresh polish.
Your Questions on Polishing Leather Boots Answered
Even with the best guide, questions always pop up. We get it. Here are some of the most common things people ask us about polishing leather boots, with direct answers to help you get that perfect, professional finish every time.
How Often Should I Polish My Leather Boots?
Honestly, it all comes down to your lifestyle and how you wear your boots.
If your boots mostly see the inside of an office or a casual weekend outing, a full polish every 4-6 wears is a great rule of thumb. This keeps them looking sharp and the leather healthy.
But if you're putting your boots through their paces—think rain, snow, or dusty trails—you'll need to show them some love more often. A quick pass with a horsehair brush between polishes is also a fantastic habit to get into. It’ll knock off surface dust and bring back a bit of shine in just a few seconds.
Can I Use One Polish for All My Different Colored Boots?
This is a common question, but the answer is a firm no—it’s always best to match the polish color to your boots.
Using the right color is crucial for covering up scuffs and keeping the tone rich and consistent. If you use black polish on brown boots, for instance, you're not just polishing them; you're permanently staining and altering the color of that leather.
For those one-of-a-kind or custom colors—like something you might dream up in our Design Lab—a neutral (uncolored) polish is your best friend. It delivers all the shine and protection you need without messing with that perfect, hand-picked hue.
What Is the Difference Between Wax and Cream Polish?
Getting this right is one of the secrets to a truly professional finish. They look similar, but they do two very different—and very important—jobs.
-
Cream Polish: Think of this as a moisturizer for your leather. It's packed with pigments and conditioning oils that soak deep into the hide, reviving faded color and keeping the material supple and crack-free.
-
Wax Polish: This one is all about surface protection and shine. It creates that brilliant, high-gloss finish while forming a tough barrier against water and scuffs.
Most of us, including our own artisans, follow a two-step process: start with a cream polish to nourish the leather, then follow up with a light layer of wax to seal in the moisture and get that mirror shine.
My Boots Are Made of Exotic Leather Can I Still Polish Them?
Hold on! When you're dealing with exotic leathers like alligator, snake, or ostrich, you need to change your approach completely. These materials require specialized care and should never be touched with standard boot polishes.
The waxes and solvents in traditional products are far too harsh. They can strip the unique textures, ruin the delicate finishes, and cause irreversible drying or discoloration.
Always, always use cleaners and conditioners specifically made for the type of exotic leather you own. If you’re ever in doubt, especially with a custom pair, talk to a professional leather care expert. It’s the only way to truly protect that kind of investment.
At Alexander Noel, we believe caring for your handcrafted footwear is just as important as the design process itself. It’s an extension of the bespoke experience.
Related post
24
May
17
May
16
May
16
May
16
May
